Audio Echo Effect
Video
Here is a video of my friend James playing his electric guitar, patched through the audio echo effect system, and then to his amp. I didn’t make any effort to prove that this isn’t a conspiracy, so you’ll have to take my word that the echo effect is actually happening on the breadboard and not some hidden pedal or options on his amp. While I’m at it, I apologize for the camera phone video quality.
Description
This project is an audio echo/delay effect “pedal” of a sort, though I did most of the testing with a regular electret microphone and ear buds or external speakers. The circuitry of the “pedal” is fairly straight forward: the microphone/input is AC coupled, then amplified around a VDD/2 bias (I’m running on a single supply) across two stages, one of which is adjustable, then passed through a low pass filter at around 10-15KHz to clean out any high frequency in the input, and fed to a microcontroller for some processing. I used an mbed, which is a LPC1768 hardware platform plus all of that arduino pseudo-coding, because they’re pretty neat and super quick to develop with, but any micro with an ADC and DAC will do. The output of the microcontroller’s DAC is smoothed (LPF) out by a cap and fed to a final amplification stage, and then AC coupled to a speaker/output. Although I’ve labeled this particular project Audio Echo Effect, you can really do whatever you’d like on the mbed/micro for the processing, so I like to think about it as more of a general audio effect platform I can tinker with (though a DSP instead of a micro would probably do better). The mbed and LM358s are the only ICs, the rest of the parts are passives and connectors. Substituting the mbed for a more economical microcontroller with an ADC, DAC (or even building an R2R DAC), and sufficient memory, this project can be built for under $15.
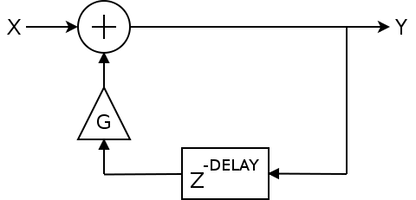
There is a voltage divider potentiometer connected to an ADC of the mbed to adjust the amount of echo/delay. The actual delay effect is implemented by the following DT system:
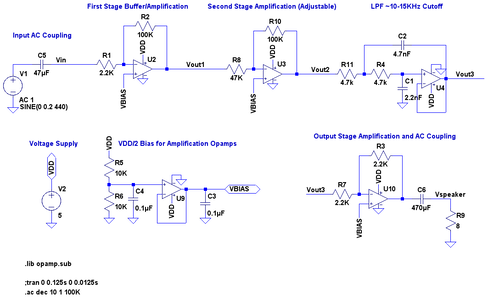
The negative DELAY power of z corresponds to the “delay” variable and the G multiplier corresponds to the “inv_gain” variable in the mbed code. Although the mbed code does support adjusting the gain variable with a voltage divider potentiometer hooked up to p16, I found that the echo effect worked quite well with the gain fixed at 1/3. Below is the EAGLE schematic, LTspice schematic (for some frequency response simulation of the surrounding analog parts), mbed code, and pictures/video.
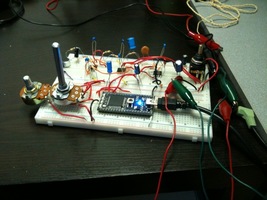
See pictures and video sections for some eye candy. I think the mbed’s blue led makes it look really hi-tech.
Possible Improvements
- Better op-amps than the LM358 should be used.
- With the main low pass filter at around 11kHz cutoff, the sampling frequency should be around 22kHz. Since I’m essentially sampling as fast as possible in the mbed code, it’s not clear what the exact sampling frequency is, but it’s likely to be excessively high. Sampling explicitly at 22kHz should allow for a better use of sample memory as well as a longer echo effect.
- Each amplification stage could also incorporate a single-pole low-pass in the feedback loop, also at the Nyquist frequency.
- The two amplification stages could probably be collapsed into one.
- Better filter topology could be implemented instead of the Sallen-Key.
Schematic
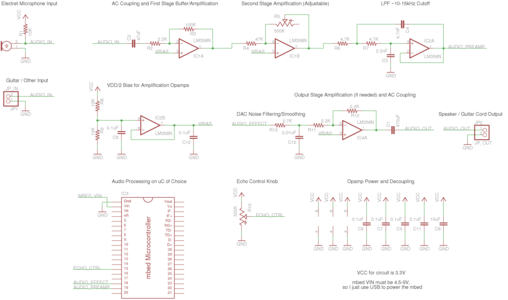 |
Changing R4 to 10K helps for microphone applications, but input from a electric guitar pickup comes in pretty strong so I found 47K worked well when using an electric guitar.
EAGLE schematic: echo_effect.sch
LTspice Simulation
I used LTspice for the frequency response simulation of some of the analog circuitry.
LTspice schematic: echo_effect_lts.asc
mbed Code
#include "mbed.h"

#define MAX_DELAY   15000
#define MIN_DELAY   50

#define MAX_GAIN    25
#define MIN_GAIN    2

/* ADC for the microphone/input, DAC for the speaker/output */
AnalogIn mic(p19);
AnalogOut speaker(p18);
/* Two potentiometer voltage dividers for the delay/gain control knobs */
AnalogIn delay_knob(p15);
AnalogIn gain_knob(p16);

unsigned short buffer[MAX_DELAY];

/* inv_gain = 1 / gain; it's faster to avoid floating point during the main loop */
int inv_gain = 3;
int delay = MAX_DELAY;

void read_knobs(void) {
    delay = delay_knob*MAX_DELAY;
    //gain = gain_knob*MAX_GAIN;
    if (delay < MIN_DELAY)
        delay = MIN_DELAY;
    /*if (gain < MIN_GAIN)
        gain = MIN_GAIN;
    if (gain == MAX_GAIN)
        gain -= 1;*/
}

int main() {
    int i;
    /* Fill up the sample buffer first */
    for (i = 0; i < delay; i++)
        buffer[i] += mic.read_u16();

    for (i = 0; ; ) {
        /* Multiply old data by the gain, add new data */
        buffer[i] = buffer[i]/inv_gain + mic.read_u16();
        /* Write to speaker */
        speaker.write_u16(buffer[i]);
        /* Increment index and wrap around, effectively only using "delay" length of the buffer */
        i = (i+1) % delay;
        /* Occasionally read the knobs */
        if (i == 0)
            read_knobs();
    }
}
mbed program link: http://mbed.org/users/vsergeev/programs/echo_effect/5zrah/
Pictures
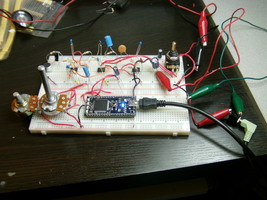
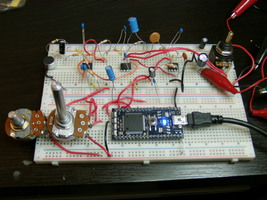
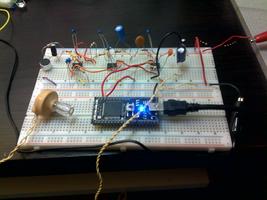
Some pictures of a breadboarded version of the system:
 |
 |
 |
 |
